After Day 11 of the build diary, we had a tank that would happily go forwards, but not in any other direction, and I hypothesised that the control codes we were using were wrong. These codes came from helpful RC Tanks Australia forum user ancvi_pIII back on Day 5. Curious as to why these codes worked for him and not me, I asked – and received a new set of control codes back. Unfortunately, even these didn’t work properly. His “Reverse Fast” code produced a slow reverse on the Raspberry Tank, but his left and right were still ineffective. Perhaps he not only had a different gearbox but a different remote control setup altogether?
I decided that there was nothing for it – I’d have to sample the packets that my tank used myself.
Step 1: Connecting Up
The tank was rewired into roughly the state it was in on Day 5. The Raspberry Pi was removed, and the original TK-YL101-3 receiver board put back. Flying leads were attached to the board’s signal out and ground, but rather than plugging them into an oscilloscope, I went with a much fancier toy.
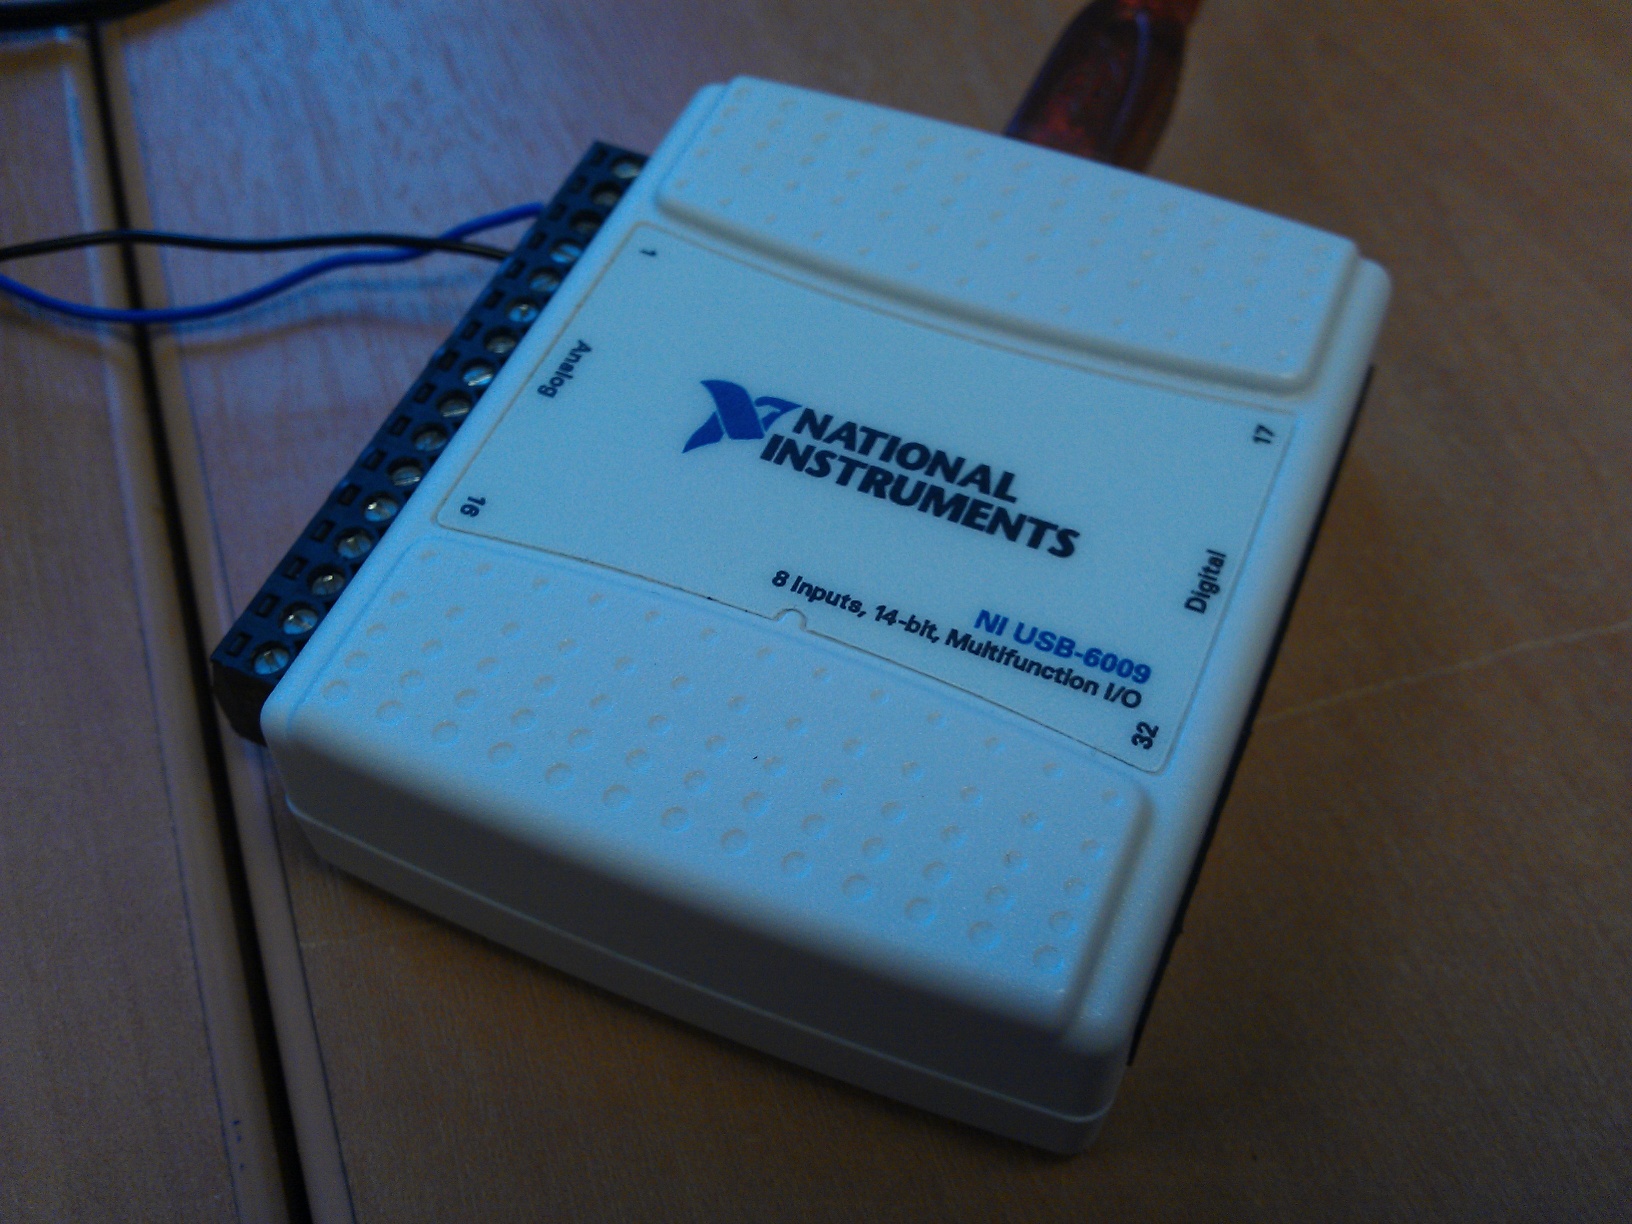
This USB data acquisition device, combined with a couple of LabVIEW apps of my own devising, would turn my laptop into a logic analyser precisely tailored to decoding the tank’s control codes.
Step 2: Data Acquisition
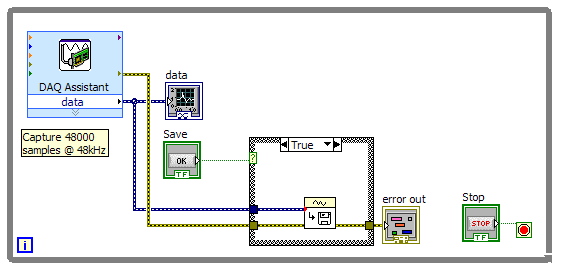
I decided to split the job into two parts – acquiring the data and processing it. This was so that I wouldn’t have to repeatedly run the tank’s motors (quite loud!) while fiddling with the complex processing code.
My first program, therefore, simply acquired data from an analogue input (attached to the output of the TK-YL101-3 board). The data would be displayed every second, and if a Save button was hit, that data would be written to disk in a user-specified file. The code looked like this:
With the program running, I entered each basic state of the tank using the normal remote control, for example pushing the right stick up for “fast forwards”. Once I was sure that the tracks were doing what I wanted them to, I hit the Save button and recorded a second’s worth of the appropriate control codes. I also recoded codes for idle, ignition, turret rotation, etc. This produced a set of 18 data blocks, each containing many repetitions of a single code.
Step 3: Data Analysis
Then came the difficult part. For each file, my analysis program would have to read the data, find and isolate a valid data packet, and convert it into a hexadecimal code for use in the Raspberry Tank control program.
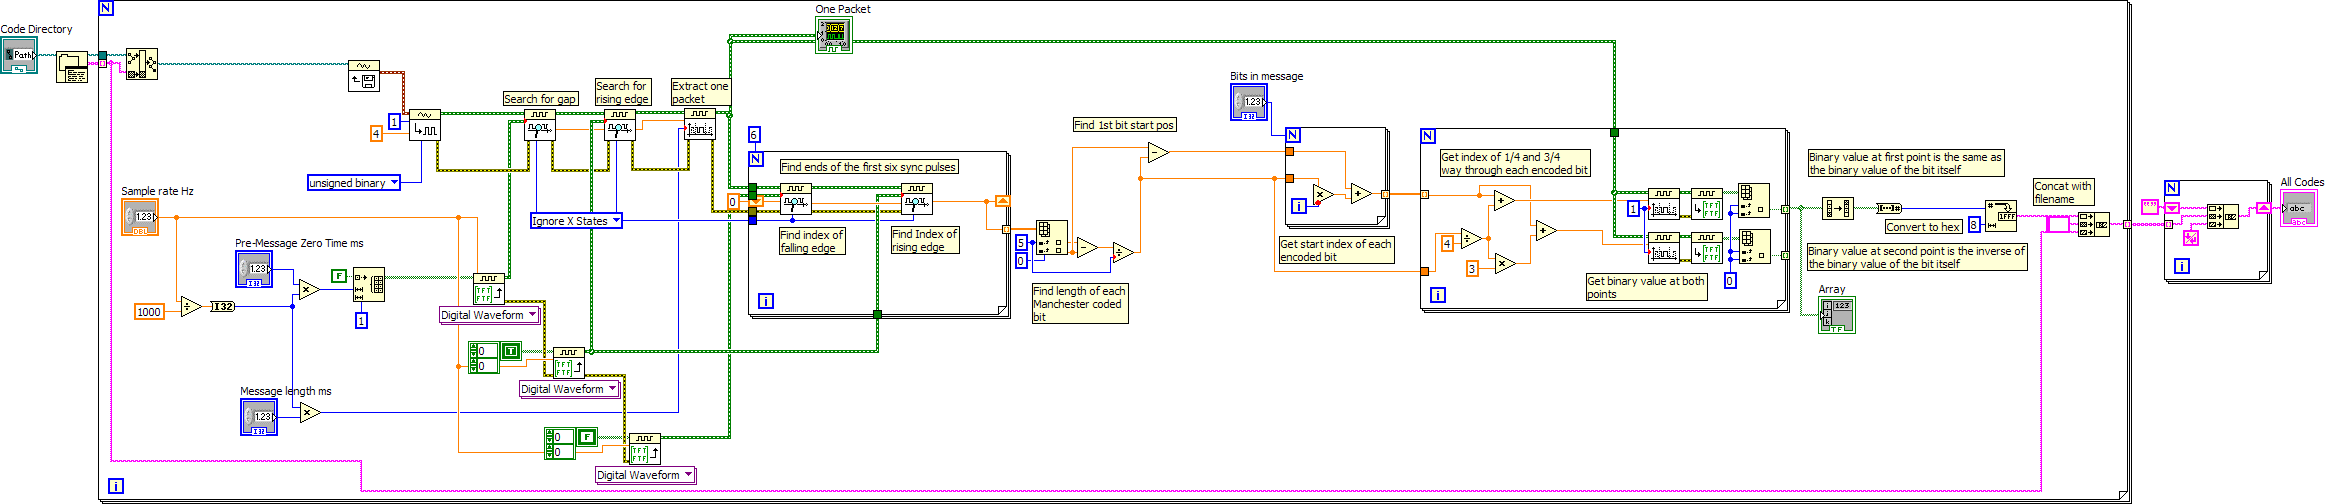
This was even more difficult than I expected. I had assumed that the pulses in the first quarter of the packet were to do with synchronisation, but that they were probably just overkill. Unfortunately I was wrong, and synching up on those pulses was absolutely necessary to judge the timing of the rest of the packet.
This program turned out to be far more complex than the acquisition program, so I was very glad to have split them! The code for the analysis program looked like this:
Once all the bugs were ironed out, the output of this program was – at last – a true copy of the control codes used in my specific tank. Here’s the program’s front panel after a successful completion:
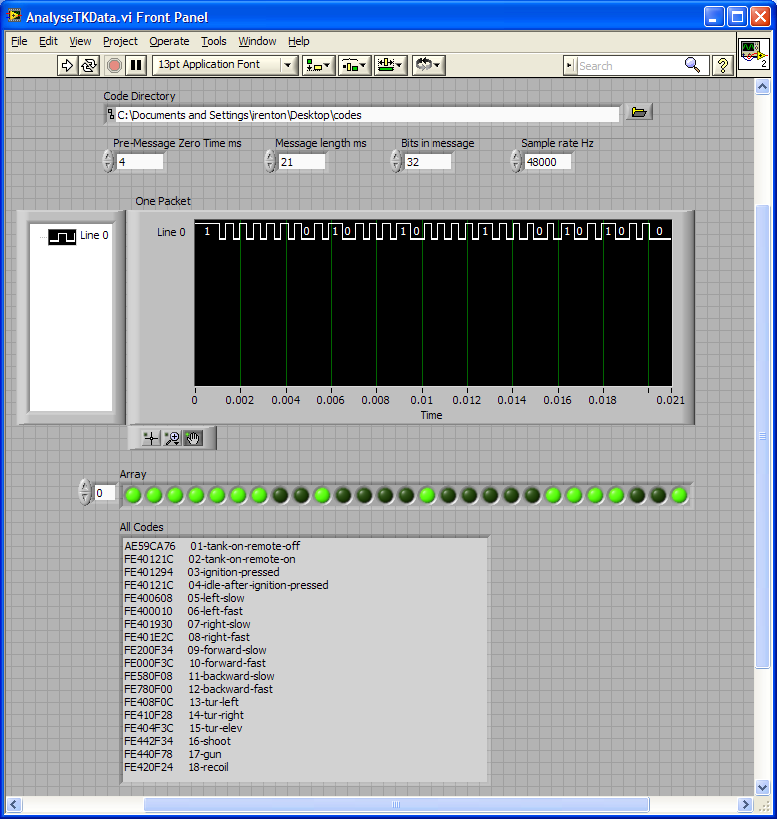
And the list of control codes in full:
FE40121C     02-idle-before-ignition-pressed
FE401294     03-ignition-pressed
FE40121C     04-idle-after-ignition-pressed
FE400608     05-left-slow
FE400010     06-left-fast
FE401930     07-right-slow
FE401E2C     08-right-fast
FE200F34     09-forward-slow
FE000F3C     10-forward-fast
FE580F08     11-backward-slow
FE780F00     12-backward-fast
FE408F0C     13-tur-left
FE410F28     14-tur-right
FE404F3C     15-tur-elev
FE442F34     16-shoot
FE440F78     17-machinegun-sound
FE420F24     18-recoil
At the end of the day, we just had enough time to enter one of these codes into the control software – I picked “left fast” – to see if it worked. Lo and behold, it did!
Step 4: And Now…
Now that we have another set of control codes – in places quite different to those offered by ancvi_pIII – we can examine their differences and see if more can be determined about how the control packets work. Also, with an extra 18 valid codes, we may be closer to figuring out the checksum algorithm.
But while that work continues in the background, we now have the capability to command all the tank’s functions, correctly, from the Raspberry Pi – which means that next time on the Raspberry Tank Build Diary, we can get it driving around properly while controlled via SSH. We should even be able to reattach and command the tank’s upper chassis too. Let the shooting begin!
Add a Comment