On Day 3 of the Raspberry Tank build diary, we took the tank to pieces and stripped it down to the bare minimum required to have a remote control capability: the receiver board, main control board, motors and battery. Today, we examine the possibilities for adding the Raspberry Pi to the vehicle.
Schematics, Simplified
As shipped, the Heng Long Tiger I tank that this build is based around (the Smoke & Sound model with an RX-18 controller) has the following electrical schematic:
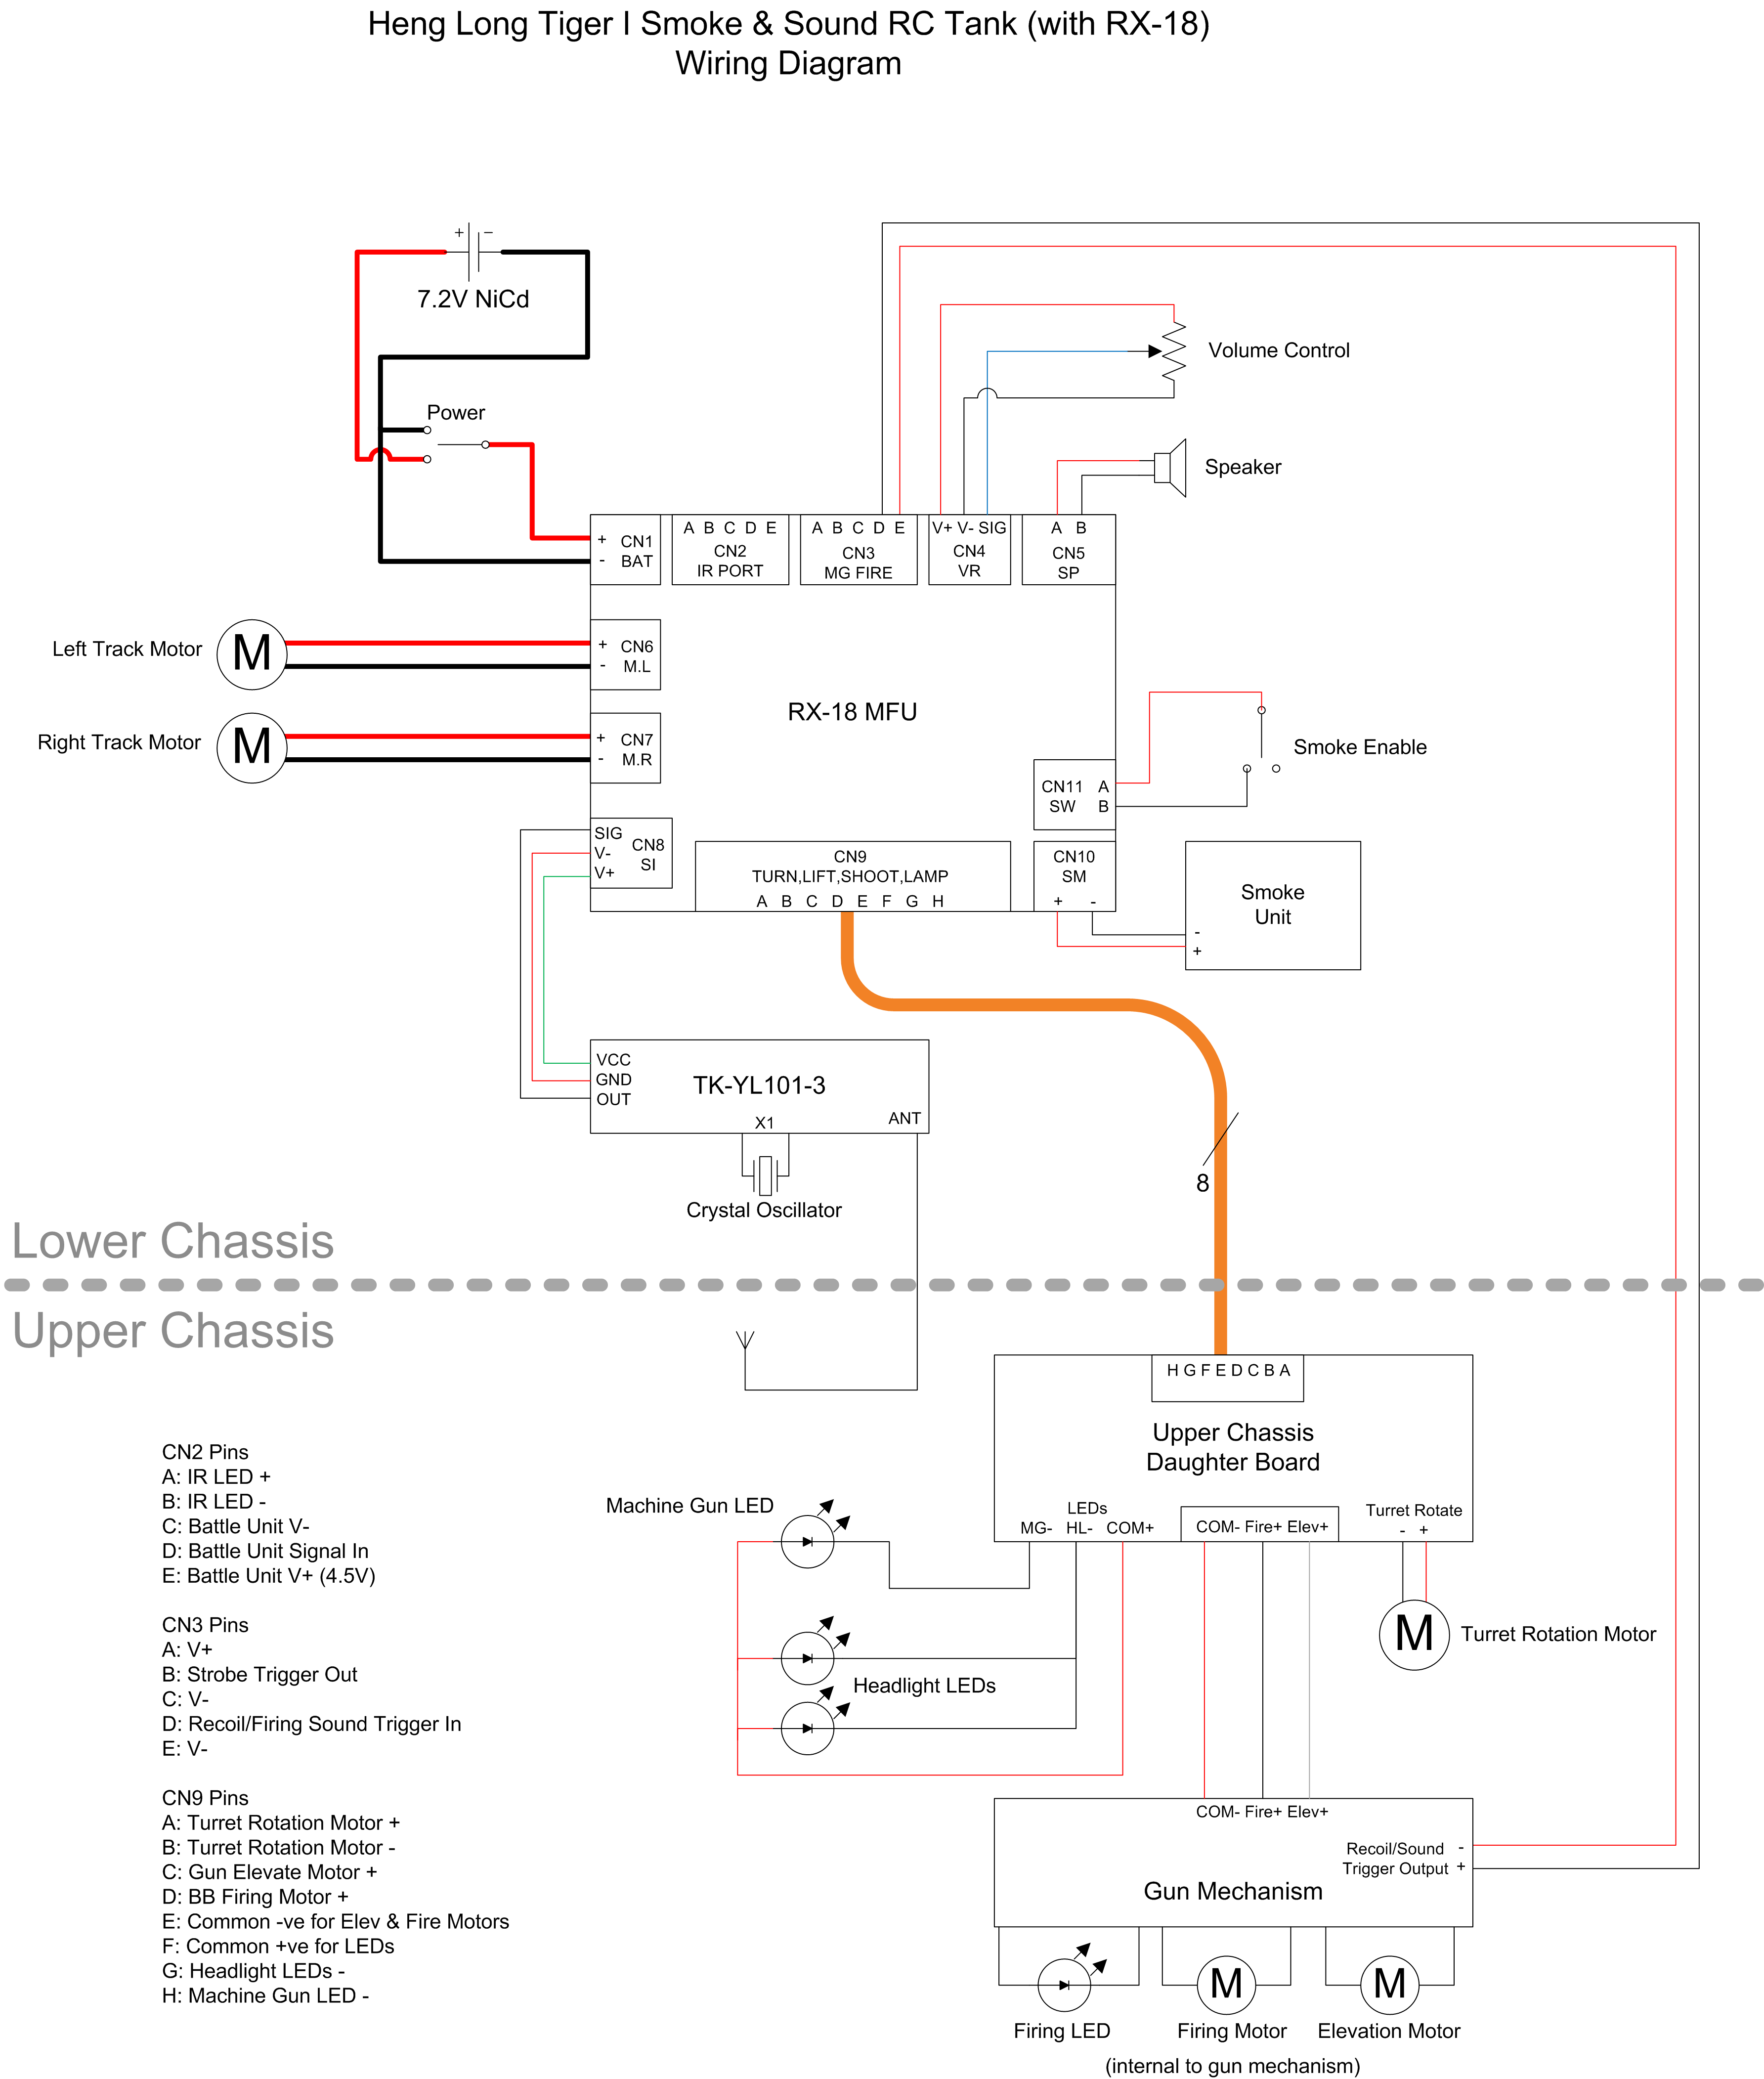
You can download that as an SVG file here: Heng Long Tiger I Tank Schematic
The colours of the wires shown are those on the tank I am using – they may vary between models, as I have seen some photos with different cable colours. Custom kits to upgrade tanks from an RX-13/14 controller to an RX-18 are also available and may come with different wire colours. When in doubt, trust the markings on the boards and in the schematic above. Case in point, the double-take that ensued when I looked at the connection between the RF receiver board (TK-YL101-3) and the main board:
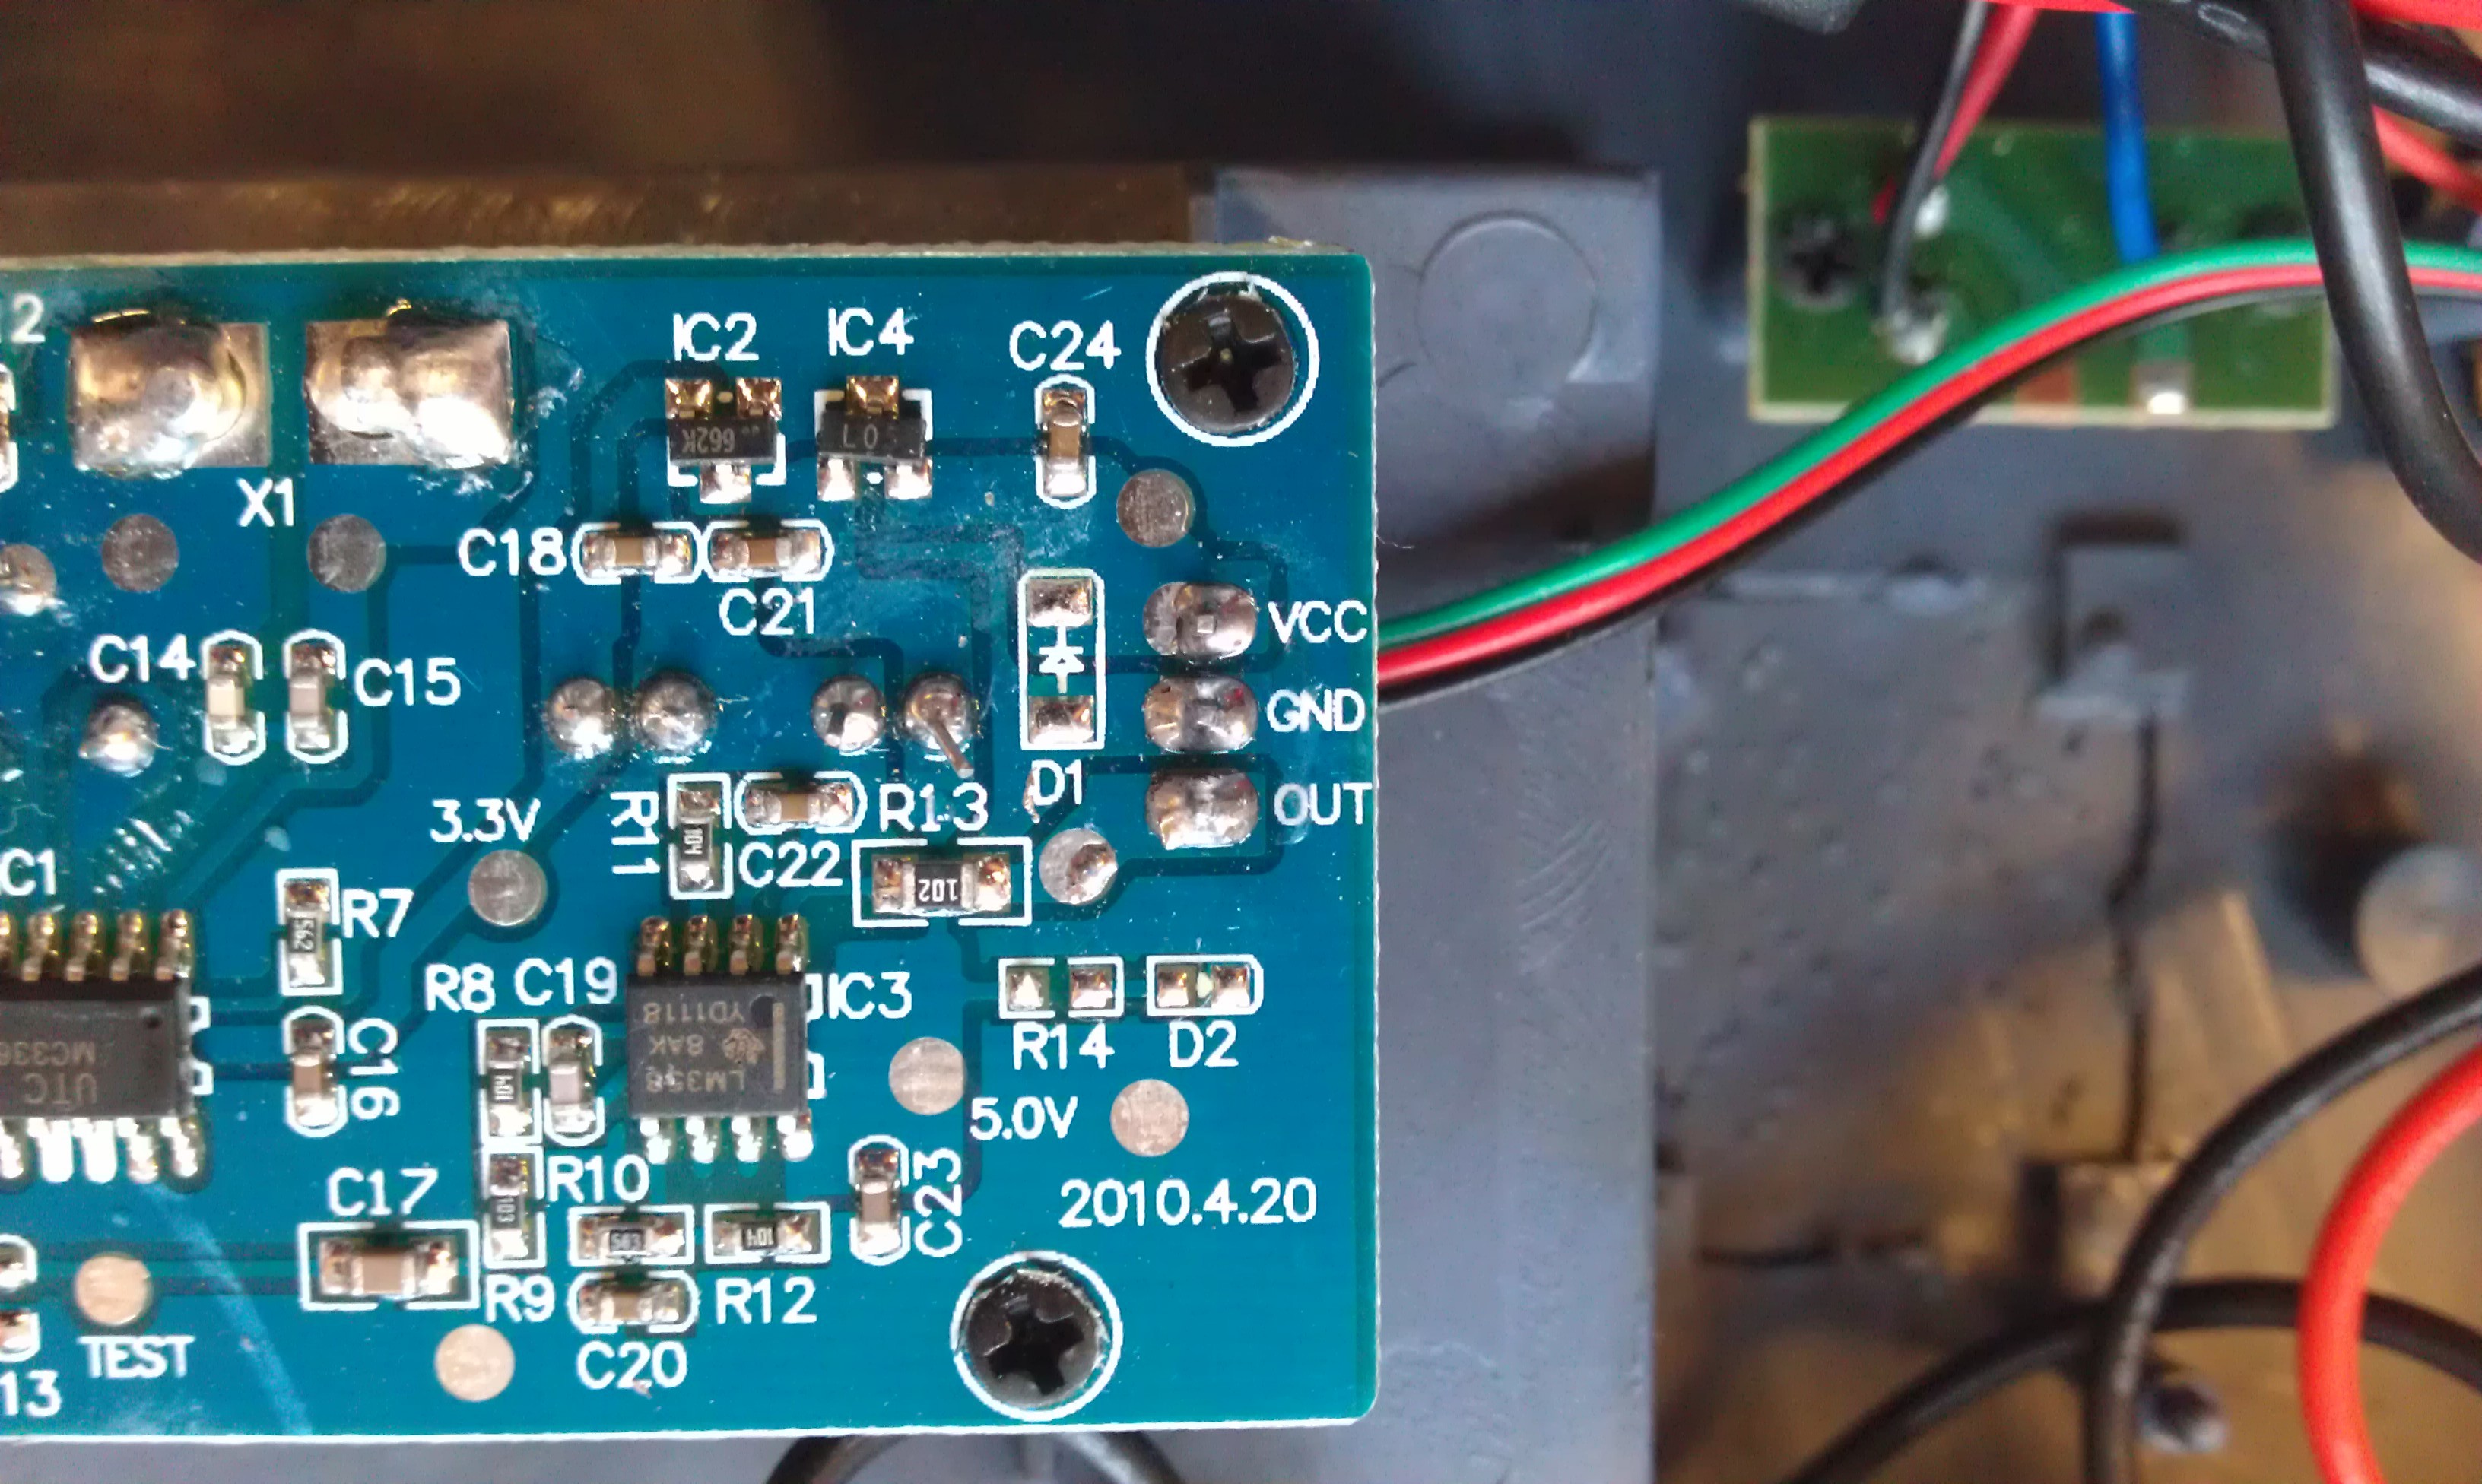
Yep, that really is green for VCC, red for Ground and black for data.
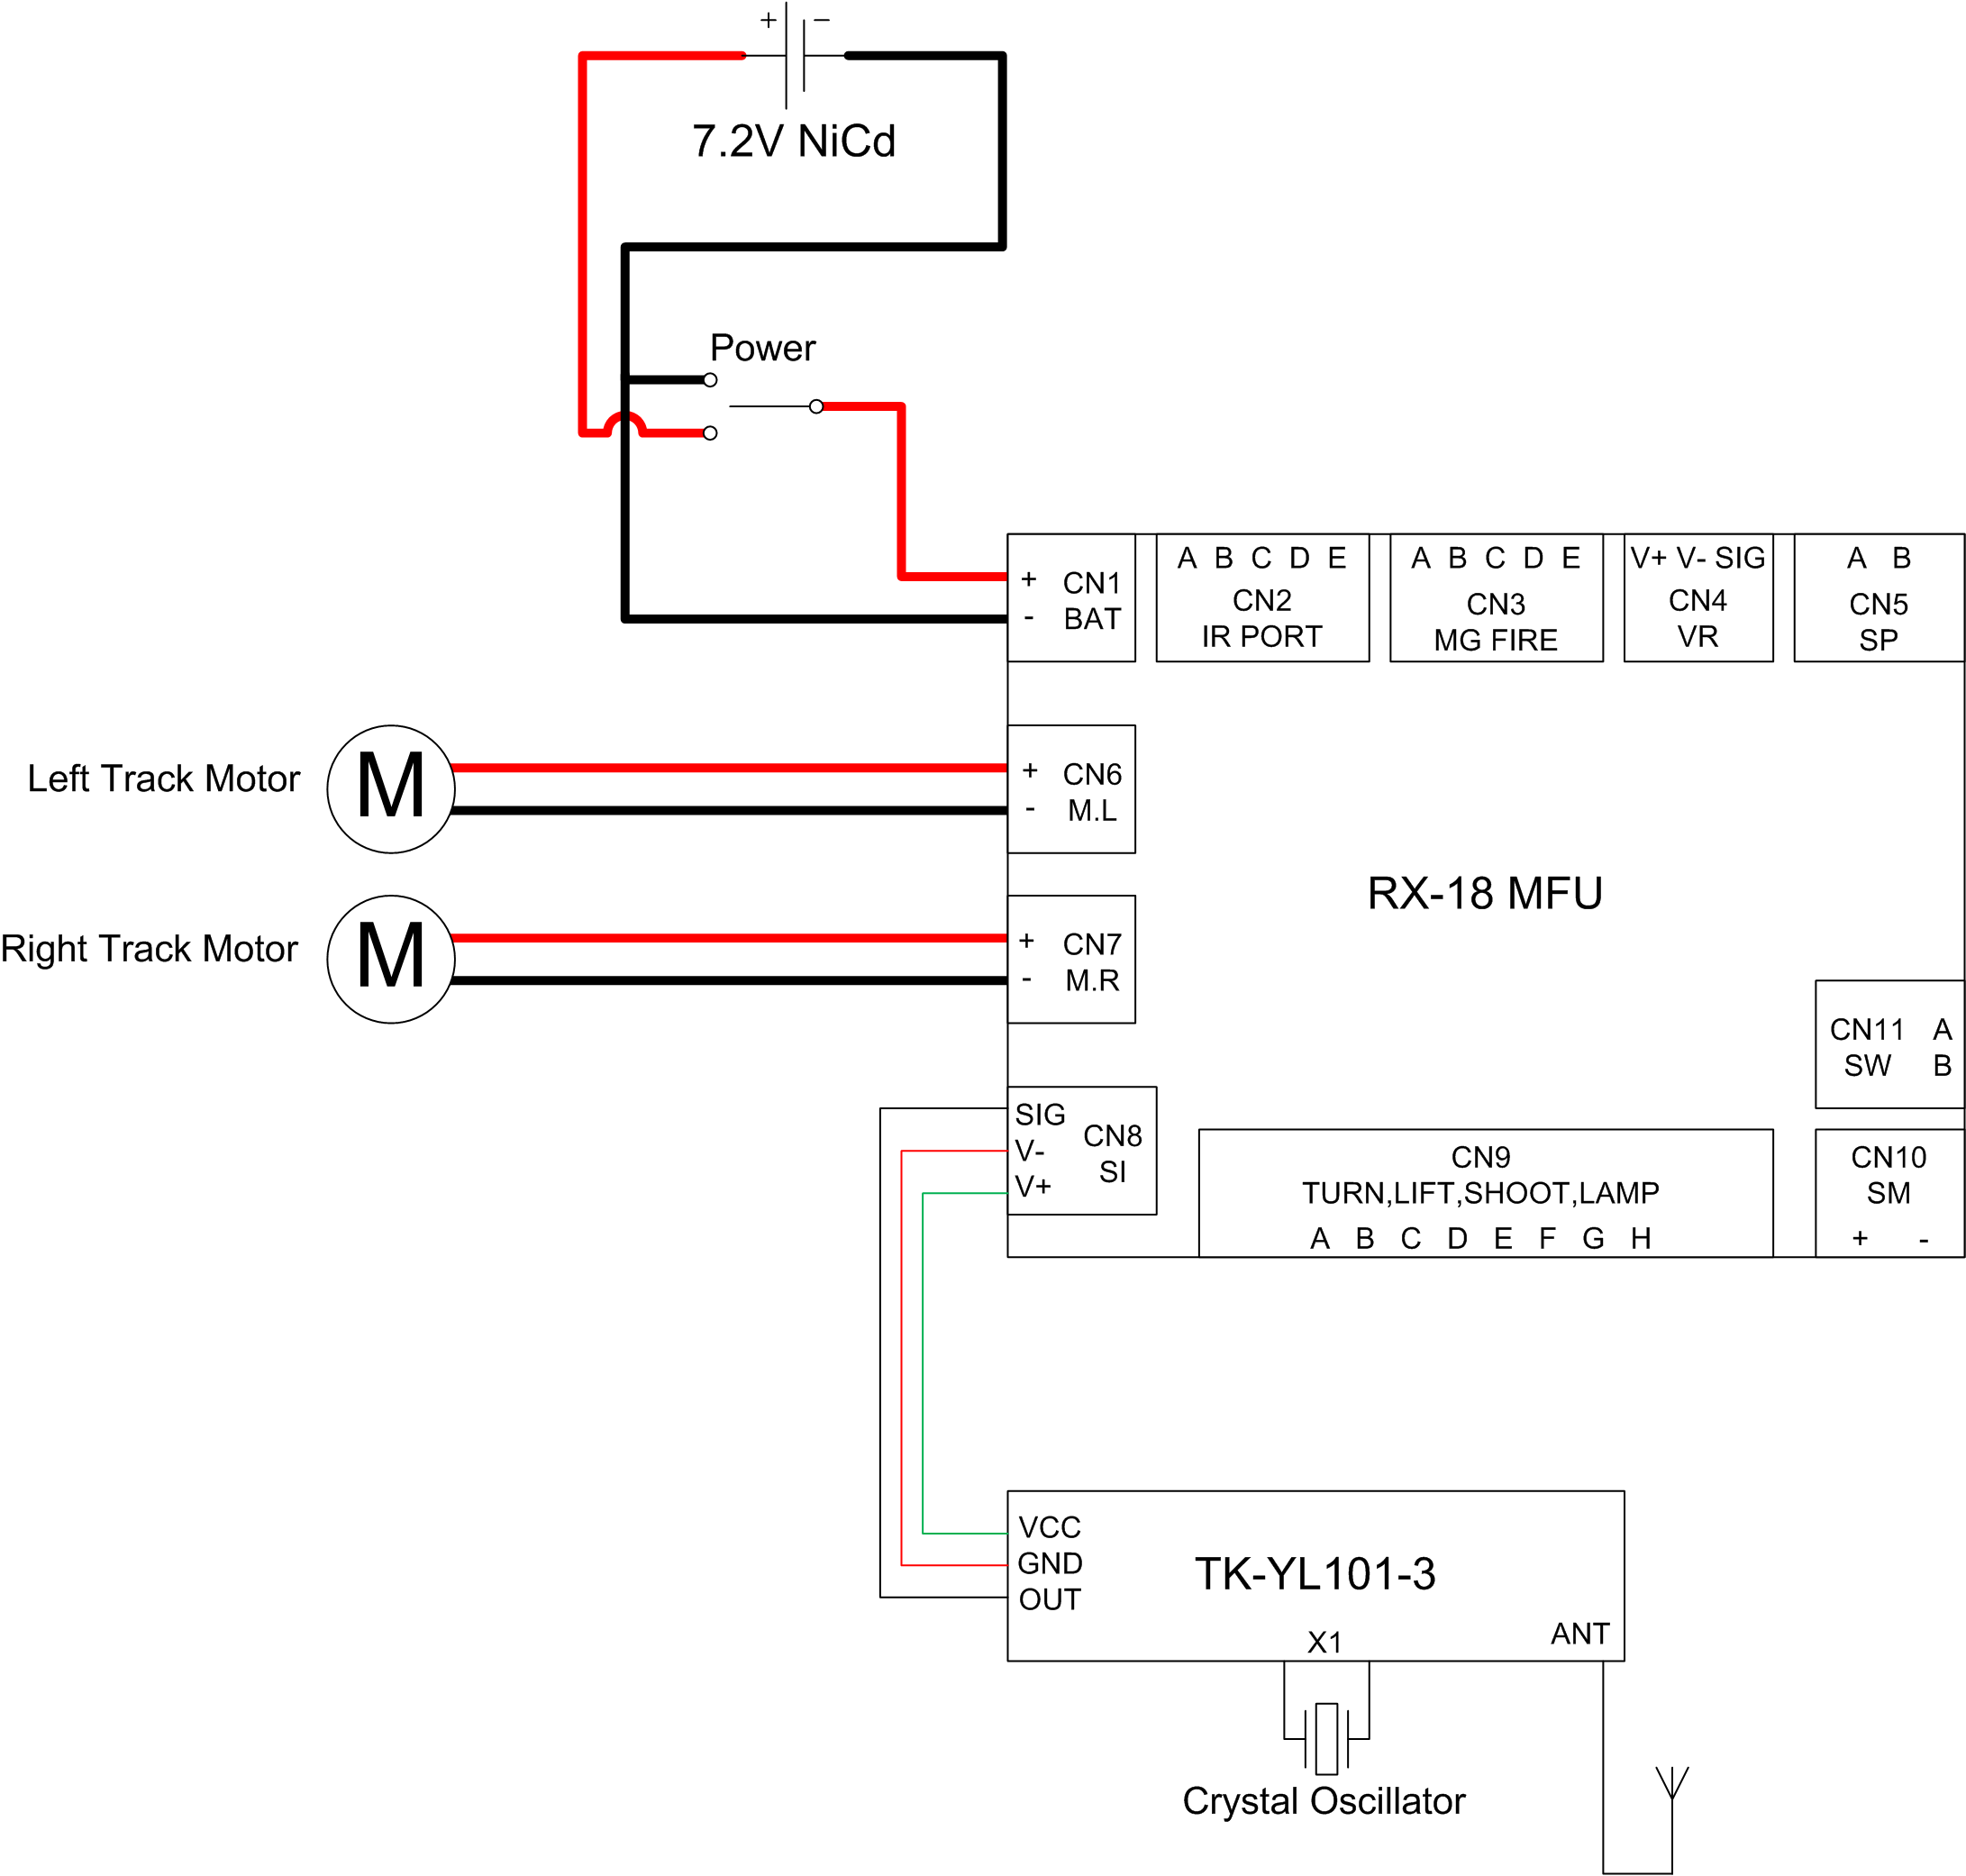
During day 3, the upper half of the chassis was removed, along with the smoke and sound components from the lower half. The following schematic shows what we are now left with. (Day 3 did not explicitly mention unplugging the volume control and the smoke switch from the RX-18 – ports CN4 and CN11. However, as they are useless without a speaker and smoker unit anyway, they have been left off this diagram.)
Choices, Choices
Other similar projects such as this one on Hack A Day have chosen to replace all the electronics inside the tank in favour of Arduino devices with motor control add-on boards. We could take this approach and remove both the RX-18 and TK-YL101-3, replacing them with the Raspberry Pi to do the high-level control and the Arduino to do the low-level control.
However, it would be nice if we could keep the RX-18 – it’s already set up for us with the appropriate control circuitry for all the motors in the tank, and as a bonus it even provides a 4.5V output that may be capable of powering the Raspberry Pi itself.
Will this be possible? Maybe.
The RF receiver board has only a single data line connecting it to the RX-18 – the one oddly coloured black in the photo above. If we can hijack this connection, and have the Raspberry Pi pretend to be the RF receiver, then we can keep the RX-18 intact.
To do this, we will need to reverse engineer the protocol used for communication between the two – and see if the Raspberry Pi is capable of recreating it. And that’s exactly what we’ll do next time, on Day 5 of the Raspberry Tank build diary!
Credit where it’s Due
I used partial schematics and annotated photos from spiraltron on the RCGroups forum, from Phyrephish on the RC Tanks Australia forum and from David’s Battle Circuit website to ensure that the circuit diagrams I presented in this post were correct.
Add a Comment